 Many times as a home inspector I come across situations where tempered glass (safety glass) should have been installed but was not. Common locations are in bathrooms, windows near a door, windows near the floor and several other locations in a home. A professional home inspection will normally advise you on those locations that are in need of safety glass. Often it is difficult to tell if a window has safety glass installed unless the etching on the window indicating that it is safety glass is visible. Sometimes the glass will have a "wave" like appearance when viewed from the side, this is from the tempering process but it is not always visible. The picture to the left an example of a window "bug" or etching. When a home inspector can not tell if a window has safety glass the normal recommendation is to have it installed or the window replaced with safety glass. This can be costly and with custom windows very time consuming, which in real estate transactions can become a problem.  Recently I have become aware of a product that has been around for many years but has gained a new use inside homes. For years it has been used to keep windows from being broken by burglars and from flying objects during storms. It is called 3M Security Window Film. This specific product is called Safety S80 film. It is being used in place of tempered glass/safety glass on windows that are required to have it in pre-existing installations and in some instances new construction. Keep in mind that some local code officials are allowing its use with new construction. So instead of replacing the windows glass with safety glass this film can now be applied to the interior of the window. Before using this product, you need to check with your local code officials to see what their feelings are on this, not all of them will agree or know about this product. 3M Safety Film, Safety S80 is designed for use on the interior surface of windows. It is composed of a transparent and weather stable polyester film, scratch resistant surface and a strong acrylic adhesive. The films high tensile strength and elongation at break increases resistance of the glazing system to impact and pressure. The film also significantly reduces the transmission of UVA and UVB rays which are the main cause of fading. 3M Safety Films provide an effective protection from injuries to persons or damage to items caused the fragments of broken glass. In the case of glass breakage the fragments are held together by the strong acrylic adhesive. This film can save you hundreds of dollars over replacing the glass. It is a viable option in many situations. With the building boom we have going on in the greater Nashville area we also have a boom on builder screwup's that are not being caught by our municipal code inspectors! For the most the city inspectors do a good job but they just do not have the time to look at every little thing in a home, but what I found the other day is not what I would consider to be a little problem! Water heaters have a safety device that is called a TPR, this stands for Temperature Pressure Relief valve. It is designed to keep the water heater from blowing up in the event of a problem with the thermostat or burner by discharging very hot water under high pressure through a pipe. This discharge pipe should terminate to no less than 6" from the ground so the hot water/steam will not hurt anyone. Well on this particular home I noticed that the discharge line from the second floor water heater disappeared down through the wall, which itself is not a good thing! Anyway, after a stroll around the home I could not locate the same size pipe near the ground. But about eight to ten feet above my head I did see a 2" pipe sticking out the side of the home. Surely it was not the end of the TPR discharge line! No way the city inspectors would miss this, but then we are all human. So I went back to the water heater and tripped the TPR (something that I seldom due because the valve does not always seal afterwards, but this was a new home still owned by the builder) and guess what I found! Water shooting out that 2" pipe and almost hitting the house next door! So if you are buying a new construction home do yourself a favor and have it inspected before you close on it!
I'm not really sure why guys like to pressure wash everything! Maybe it is that feeling of power having 10X's the force of a hurricane in your hands, I just don't understand it. Anyway, I say all of this to issue a warning to any and all homeowners that own a power washer or are thinking of having their home power washed! DON'T DO IT! Just think about the force of the water that is shooting out of that nozzle. Even at it's lowest settings it will take the skin off your foot or any other body part you stick in front of it. So just imagine shooting that water at your home and then imagine all of little nooks and crannies that water is going to find. You are shooting water into areas you don't want it to go! Some claddings (siding material on the exterior walls of your home) can take the force of a pressure washer a little better than others. Brick holds up fairly well, but it can still be etched and damaged. Vinyl siding can be stripped off the side of a home and if you have Hardy Plank or any other cementious siding , it can be split and delaminated. Forget wood, unless you want to strip the paint right off the planks! As for Stucco or EIFS (artificial stucco), don't even think about power spraying a wall clad in stucco or EIFS. You will strip off the finish coat in seconds! The following photos are of an EIFS home that I inspected. The lamina or finish coat was all but removed from this home. The underlying mesh was visible on every single wall and window banding. The good news was that all moisture levels were low at all windows and penetrations. The $10,000 worth of restoration work that they previous owner did five years ago was working. The bad news was that the $200 pressure wash job removed the lamina coat and now the current owner will need to have it reapplied to the tune of around $15,000 to $20,000 If you want to clean your home, you can purchase several different house washing products. Most come in a plastic bottle that you attach to your garden hose. It sprays a chemical (similar to household bleach) with other surfactants in it to help remove the dirt and grime. You let them sit for a few minutes and then spray it down with clean water from that garden hose. NO POWER WASHERS!! So what is one to do with that fancy power washer you now have? How about cleaning the driveway! But, be careful if you have exposed aggregate! Again too strong of a stream and you will strip those little stones right off… Another option would be to sell that spraying beast on Craig's list or have a garage sale! 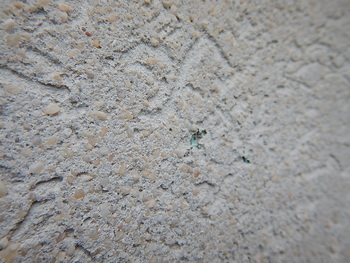 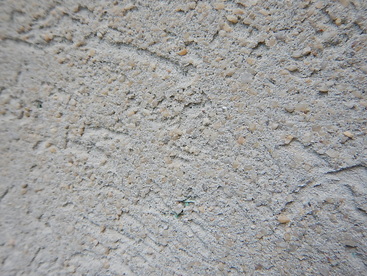 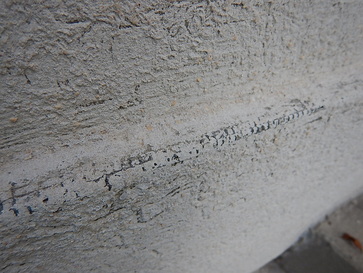 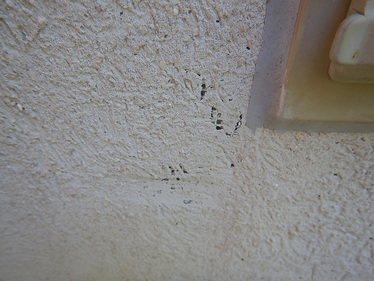 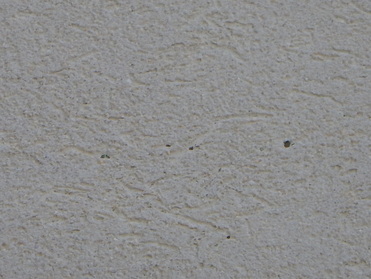 Scott Patterson specializes in Stucco, EIFS and AMSV (Faux stone) inspections through out Tennessee and the South. Call 615-302-1113 if you have a question or need to setup an appointment.
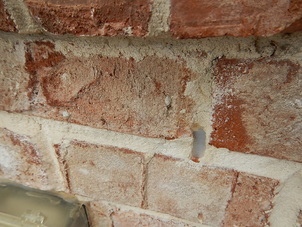
Every year I get several request for photos of strange items I find while doing inspections. ASHI has a great source for the strange and unusual inspection finds by inspectors from all across the country. Postcards from the Field has been sharing the strange and unusual for many years. Take a look at Postcards from the Field and enjoy. Every issue of the ASHI Reporter will have several Postcards from the Field in it. Just check each issue for some great photos in addition to some very informative articles. Postcards from the Field  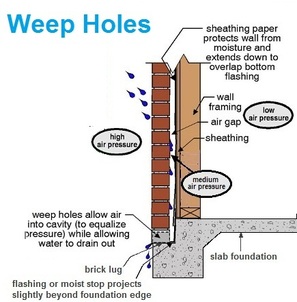 If you have ever seen what looks like missing mortar between the bricks about every two or three feet on a brick veneer wall you are most likely looking at what are called weep holes or weeps. They are an important part of the brick or masonry veneer system. In building construction, weeps are typically found in a masonry veneer or cavity wall, just above the flashing. The cavity serves as a way to drain this water back out through the weep holes. The weep holes allow wind to create an air stream through the cavity. The stream removes evaporated water from the cavity to the outside. Weep holes are also placed above windows to prevent dry/moisture rot of a wooden window frame. Now the other day while doing an inspection on a 5400 square foot six year old home, I found something that I see a few times a year. A homeowner thought that the weep holes were a defect or mistake made by the mason when the brick was placed on the home. So Mr. Home Owner decided that he needed to seal each and every single weep hole with silicone.. I stopped counting at the 26th sealed weep! This really could be a major problem if the silicone can't be fully removed from the weep holes. It would defeat the reason for the weeps and could cause major damage to the wall of the home. So never seal those open holes in the brick walls on your home!
A good deck can improve the value of your home and make for an enjoyable space to relax with family and friends, but improperly built decks are also one of the number one problematic items we find during a home inspection. So many folks do not follow the prescribed and published deck building guidelines for the proper construction of a deck and very seldom are permits taken out to build a deck, so no permit means no inspection or oversight of its construction. Even the professional deck builders make mistakes! While doing an inspection I came across this deck. It was a large deck that measured 20' in length and at it's widest point 18'. They built the deck with composite deck boards, which are not inexpensive. They used composite railings, guards and handrail on the stairs. this is a very expensive deck.. The listing agent said it was valued at $16,000! When I walked up the stairs, I noticed that I had to bend to the side to hold the handrail. The handrail was only 23" high at it's highest point along the deck stairs. It should be at a minumn 34" along the stairs.. So we have a problem! The deck builder had only one job to do and that was to build the deck properly and they didn't do that! Handrails are so important and need to be built to current safety guidelines. So, if you are having a deck built be sure you check and follow up with the work that is being done. Take that permit out so that it will be inspected and better yet, call a qualified inspector like Trace Inspections to double check that contractors work! 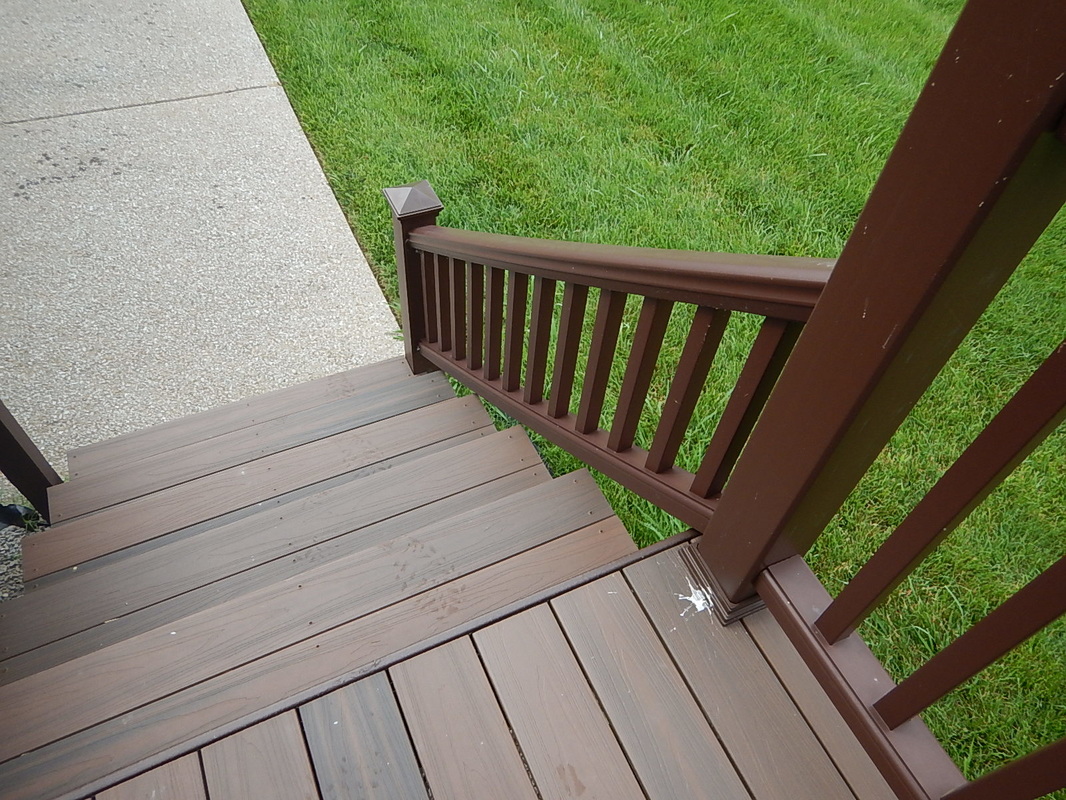 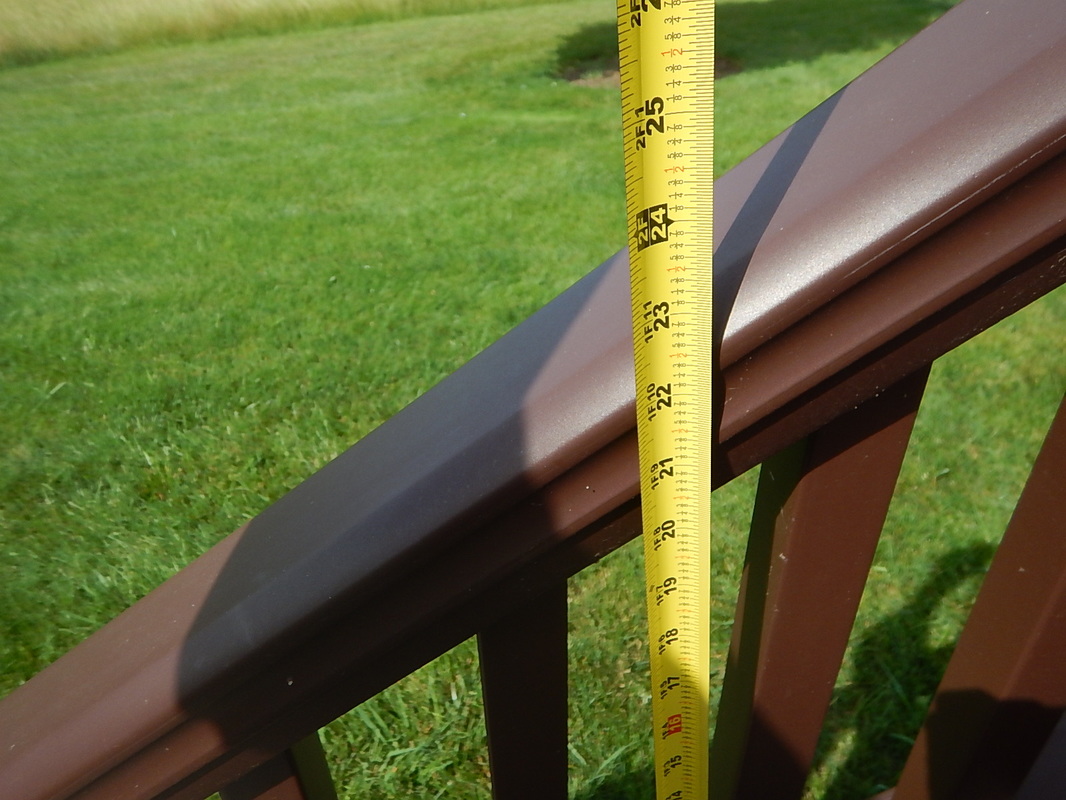 If you are building a home you should consider having a pre-drywall inspection performed. This type of inspection is done once all of the framing, electrical and plumbing rough-in's are complete and right before the insulation is installed. With this type of inspection many defects that would normally be covered with insulation and drywall can be discovered. The most common issues that are discovered are framing and plumbing problems. Both can cause costly problems in just a few years or normally right after the builder 1 year warranty is up! Many many items are viewed during a pre-drywall inspection. The following are just a few that I found during one. 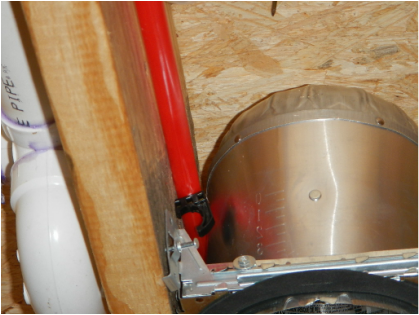 The Red pipe is a PEX waterline, it is a form of plastic. The silver fixture is a recessed light. PEX should not be closer than 12" to a lighting fixture! 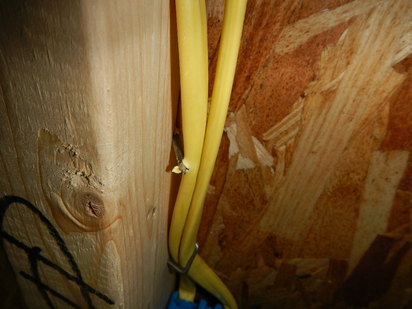 This is an electrical cable that has been nicked by a nail from when the siding was installed! 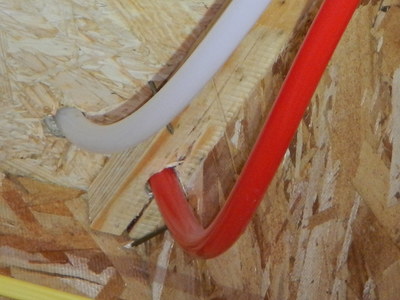 Well what we have here is a PEX line going through the top cord of a TJI joist. The plumber has damaged this joist to the point that it will most likely need to be replaced. The above three items were found during a pre-drywall inspection. They were not discovered by the builder, the builders quality control inspection or when the city did their inspection. Any single one of the above items could cause serious problems to the home if not corrected.
So you have a nice covered patio or porch but the air gets a little still and just wish you had more of a breeze, so what can you do? Install a ceiling fan! Brilliant! Now those fan paddle blades can push that air and create an arctic blast during those hot summer months… Well, that's not such a good solution when that covered porch or patio ceiling is only around 7' to 8' in height! That ceiling fan really needs to be no lower than 7' otherwise it stands a good chance of whopping someone upside their head! The blades on this fan were right at my head when I walked under it. Just a little too low for comfort. 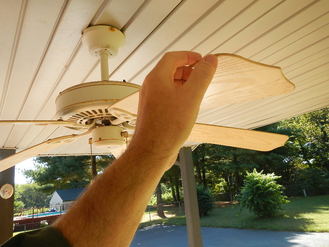  Do you know how to properly display the American flag on Memorial Day?
With Memorial Day not far away, it is never too early to start preparing of it. The following procedure is for a standing flagpole: In the morning when the flag is posted it should be raised properly to half-mast (staff). Proper raising of the flag is to take the flag to the top of the pole and then slowly and with honor, lower the flag to half-mast. Then at the Noon hour the flag should be slowly lowered and then briskly with pride and honor, raised to the top of the flagpole. It should remain at this position for the rest of the day. Why half mast and then full mast? The first part of the day while the flag is at half-mast is in remembrance for those that have given their life for our country. The rest of the day when the flag is at full mast is in remembrance and in honor for those that are serving or have served our country. I hope all will fly the American Flag with pride on Memorial Day! On a side note: If your flag is in faded, torn or tattered do not fly it! Go and purchase a new flag and then call a local Boy Scouts of America district office or contact a local BSA Troop and ask them if you can bring your flag to them so that it can be honorably retired and disposed of. If you have never seen a USA flag properly retired it is a very moving experience that all should witness. 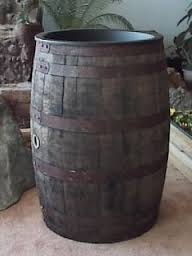 That is an old phrase that means we are running out of the good stuff! The apples are always fresher at the top of the barrel and tend to become a stinky pile of mush at the bottom. The same holds true with our housing stock, as the stock depletes(like we are seeing now) the homes left on the market are for the most, the bottom of the barrel.
Several of my fellow home inspectors were talking about this just a few weeks ago over lunch and we all agreed that the homes we are seeing now are some of the worst we have see in years. It seems that the changeover started a couple of months ago and it has done nothing but progress with no end in sight. The sad part is that the ones who are really getting hurt are those that do not get an inspection and those that pay for two, three or more inspections trying to find a descent home. So what can be done? It needs to start with the real estate agents taking control of their sellers that have their homes listed with them. Agents just need to flat tell their sellers that they need to repair the obvious items like rotting wood, dripping faucets, water stains on ceilings, leaking roofs, windows that do not open, etc, etc, etc…….. It's almost like everyone is looking at the world through rose colored glasses with blinders! |
AuthorScott Patterson has been a professional home inspector since 1995. Scott works out of the Greater Nashville TN area. Contact his team at Trace Inspections for all of your inspection needs. 
Archives
September 2023
|

 RSS Feed